How to Decorate Easter Eggs: 5 Creative & Stylish Methods
- Astrid van Essen
- Jan 11
- 4 min read

Easter decorating doesn’t have to mean bright colours or plastic ornaments. Over the years, I’ve gravitated towards more natural, handmade ways to decorate Easter eggs - methods that feel calm, tactile and timeless, and that sit beautifully in a modern home.
In this guide, I’m sharing five creative Easter egg decorating methods that are easy to try, don’t require specialist tools, and work particularly well if you love neutral interiors, Scandinavian styling or botanical details.
1. Decoupage Easter Eggs (Botanical & Vintage)
Decoupage is one of the most versatile ways to decorate Easter eggs. By using napkins or thin paper, you can achieve a soft, illustrated look that feels almost hand-painted.

What you’ll need
Hard-boiled or blown eggs
Decorative napkins, tissue paper or botanical prints
Decoupage glue or watered-down PVA
A soft brush
How to do it: Carefully tear out your chosen motif (tearing gives softer edges than cutting). Place it onto the egg and brush a thin layer of glue over the top, smoothing gently from the centre outwards. Let dry completely before adding a second sealing coat if needed.
Styling tip: Botanical illustrations, faded florals or antique-style prints work particularly well. Display finished eggs in a ceramic bowl or under a glass cloche for a refined Easter centrepiece.
2. Tie-Dye Easter Eggs (Playful but Grown-Up)
Tie-dye Easter eggs are often associated with bright colours, but when done thoughtfully they can look surprisingly elegant.

What you’ll need
Paper towel or kitchen roll
Food colouring or liquid egg dye
Rubber bands or string
How to do it: Wrap each egg in slightly damp paper towel and secure with rubber bands. Drip or spray dye onto different areas, allowing colours to blend naturally. Leave for 10–30 minutes, then unwrap and dry.
Styling tip: Limit yourself to two or three colours and choose softer shades such as sage, blush, muted blue or terracotta. Natural dyes (red cabbage, beetroot, onion skins) create especially subtle results.
3. Stamped Easter Eggs (Minimal & Graphic)
Stamping is ideal if you prefer clean lines and a modern aesthetic. The key is restraint.

What you’ll need
Foam, rubber or botanical stamps
Acrylic paint
Sponge or paint tray
How to do it: Lightly load the stamp with paint, dab off excess, then press gently onto the egg. Allow to dry fully before handling.
Styling tip: Stamp just one side of the egg for a curated look. Simple motifs such as leaves, dots or abstract shapes work best. Neutral tones or metallic gold look particularly effective.
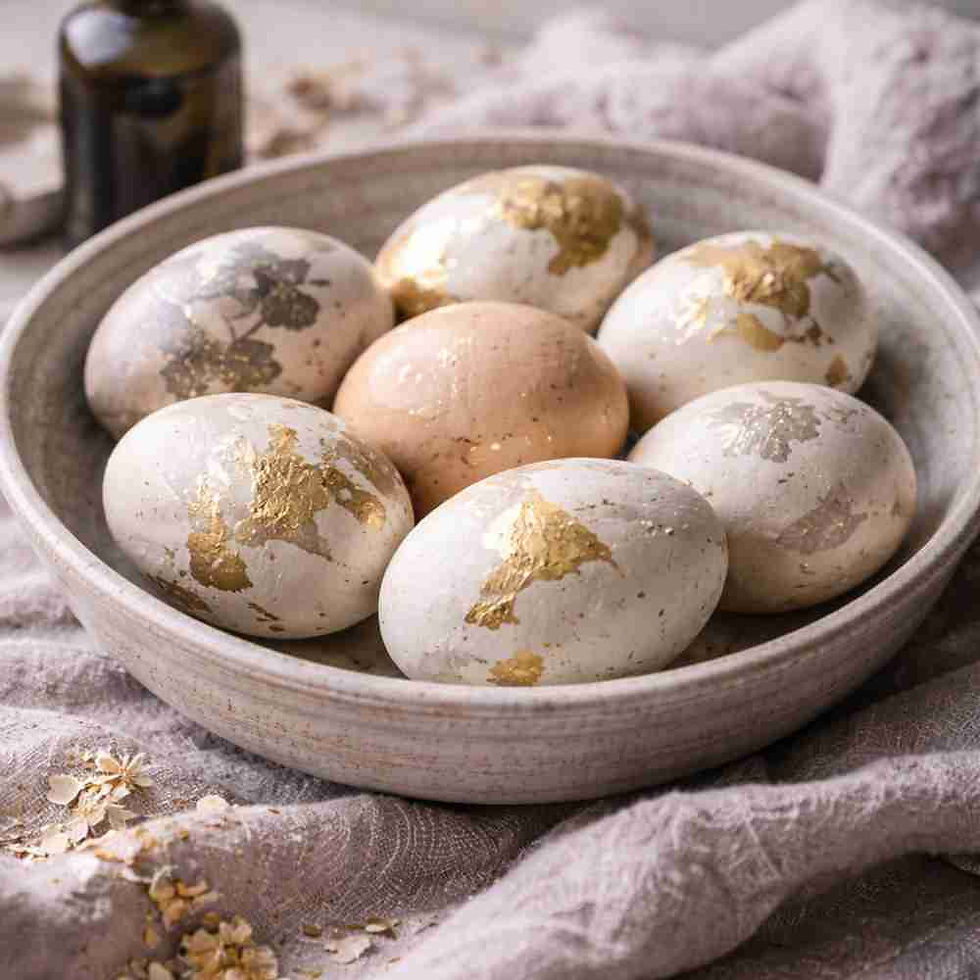
4. Gold Foil Easter Eggs (Subtle & Elevated)
Gold foil adds a touch of luxury without overpowering the egg – as long as it’s used sparingly.
What you’ll need
Gold leaf or foil
Leaf adhesive or tacky glue
Soft brush
How to do it: Apply adhesive in small areas and wait until tacky. Press gold foil gently onto the surface, then brush away the excess once dry.
Styling tip: Gold foil looks best highlighting natural imperfections such as cracks or texture. Keep the base colour matte white, stone or soft grey.
5. Decorate Easter Eggs with Dried Flowers & String (Natural & Sustainable)
This is one of the simplest and most sustainable Easter egg decorations – no paint, no glue, and completely reusable.

What you’ll need
Dried flowers, grasses or herbs
Linen string, twine or fine jute
How to do it: Position the flowers against the egg and tie gently with string. Trim the ends neatly.
Styling tip: Lavender, baby’s breath, grasses or seed heads work beautifully. These eggs are perfect as place settings or scattered across a spring table.
How to Display Decorated Easter Eggs
No matter which method you choose, styling makes all the difference:
Group eggs in ceramic, stoneware or concrete bowls
Combine with linen napkins, branches or feathers
Stick to one colour palette for a calm, intentional look
Sometimes fewer eggs styled well look more effective than a large, busy display.
If you’re enjoying these Easter egg decorating ideas, you might also like some of the other handmade Easter projects I’ve shared on Botanical Blueprint. From more tactile crafts to softer, natural finishes, they’re designed to mix and match beautifully with the techniques above.
If you love working with paper and texture, you may enjoy my guide on paper mâché Easter eggs, where I focus on neutral finishes and slow, hands-on crafting.
For a more natural approach to colour, my post on naturally dyed Easter eggs explores using ingredients like red cabbage and beetroot for soft, earthy tones.
These projects work particularly well together when styled as part of one calm, cohesive Easter display.
Final Thoughts
Decorating Easter eggs doesn’t need to be complicated. Choosing one simple technique and working with natural materials can turn Easter decorating into a slow, creative ritual rather than a task.
If you enjoy handmade, botanical-inspired décor, these methods are easy to return to year after year – adapting colours and materials as your style evolves
How to Decorate Easter Eggs: Frequently Asked Questions
Should I use boiled or blown eggs?
For decorative purposes, blown eggs last longer and are lighter. Boiled eggs are fine for short-term displays.
Are these eggs food-safe?
Once decorated, eggs should be treated as decorative only and not eaten.
How long do decorated Easter eggs last?
Blown eggs can last for years if stored carefully. Boiled eggs should be discarded after Easter.
Can children help with these techniques?
Yes, tie-dye and dried flower eggs are child-friendly and fun, with supervision.
How should I store decorated eggs? Wrap individually in tissue paper and store in a sturdy box in a cool, dry place.
.


Comments