What Is an Incense Trail? How to Make and Burn One

Updated: Aug 30
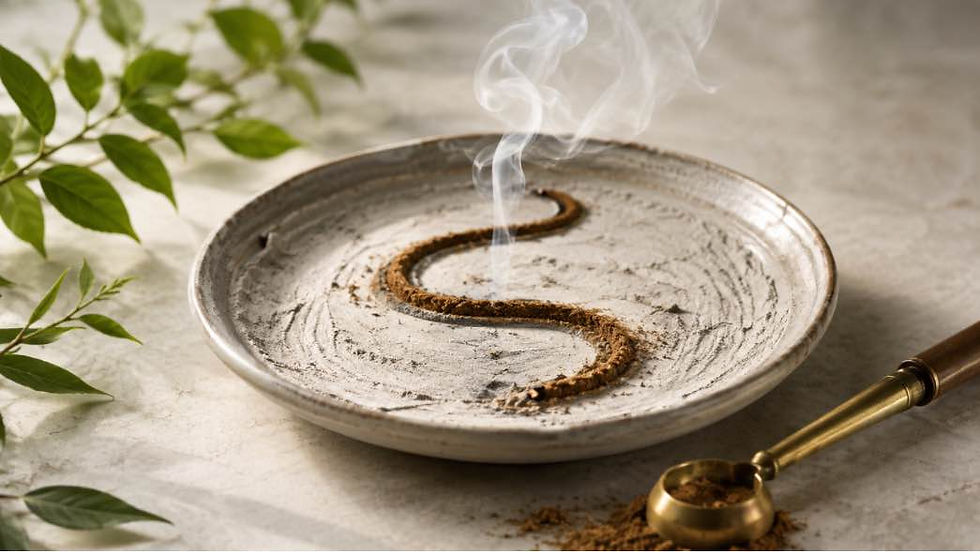
An incense trail is a continuous line or pattern of combustible incense powder laid on a bed of fine ash and lit at one end so a glowing ember slowly travels through it. Unlike resin on charcoal, the trail itself provides the burn: makko or another suitable combustible incense powder keeps the ember moving without a charcoal disc.
For a beginner, the simplest version is a shallow hand-shaped curve in purpose-made incense ash. Fill it evenly with suitable trail-burning powder, compact it lightly and ignite one end. You do not need an elaborate incense seal or koh press to learn the method.
If you are experimenting with ingredients first, our guide to creating unique loose incense blends at home is a useful companion.
What is an incense trail?
An incense trail is a continuous line or pattern of combustible incense powder that burns gradually from one end to the other. The powder normally rests on a bed of fine incense ash, which insulates the bowl while still allowing enough air around the trail for the ember to keep moving.
Some people shape a simple curved line by hand. More elaborate versions use moulds or incense seals to create precise geometric patterns. Related timed-incense practices and incense clocks have a long history in East Asia, although Chinese, Japanese and other traditions developed their own methods and meanings. For a home project, it is better to approach the trail as an incense-burning technique rather than presenting one modern tutorial as a recreation of a specific ceremonial tradition.
What is makko powder?
Makko is a fine plant-based powder traditionally used in Japanese-style incense making as a combustible binder and base. In a trail, suitable makko can help the ember travel steadily through the powder. You can use it as the main burning trail and place tiny amounts of aromatic resin or botanical powder along the top, or use a purpose-made incense powder formulated to burn as a trail.
Do not assume that any powdered herb will stay alight by itself. A beautiful-smelling powder may simply smoulder for a few seconds and go out if it does not contain an appropriate combustible base.
What you need to make a simple incense trail
A stable heatproof incense bowl with enough depth for a layer of ash.
Purpose-made fine incense ash, often sold as white chaff or rice-husk ash.
Makko or another incense powder specifically suitable for trail burning.
A small spoon, narrow shaping tool or incense press.
A lighter or long match.
Optional aromatic powders or tiny resin fragments to test along the trail.
How to make an incense trail step by step
1. Prepare the ash
Fill the heatproof bowl with a generous layer of fine incense ash and gently level the surface. You want a soft, even bed rather than a hard-packed layer. Purpose-made ash works better than ordinary sand for trail burning because the fine structure allows air to reach the smouldering powder.
2. Shape a shallow channel
For your first attempt, skip complicated seals. Use the edge of a small spoon or a simple tool to make a continuous shallow groove in a loose S-shape or gentle curve. Avoid sharp breaks or gaps: the ember needs one uninterrupted path.
3. Fill the trail with powder
Spoon your makko or suitable incense powder into the channel. Keep the depth reasonably consistent from start to finish. A section that is much thinner than the rest may burn out before the ember reaches the next section.
4. Compact it gently
Press the powder just enough to make a clean continuous line. If it is extremely loose, the ember may jump or burn unevenly; if it is compressed too hard, airflow can suffer. The right pressure takes a little experimentation.
5. Light one end
Touch a flame to one end until a small section catches. Remove the flame and watch for a steady glowing ember rather than an open flame. If the trail goes out almost immediately, relight it once and then check the troubleshooting section below if it still will not travel.
6. Add aromatics sparingly
If the trail itself is mostly makko, you can place tiny pinches of aromatic powder or very small resin fragments at intervals along the path. This lets the ember meet different scents as it travels. Keep additions light: a large lump of resin can smother the trail or produce an abrupt cloud of smoke.
Can you make an incense trail without a special press?
Yes. An incense seal or koh press makes a precise pattern, but it is not essential for understanding the method. A hand-shaped curve in ash is actually useful for beginners because you can see how powder depth, compaction and airflow affect the burn before investing in extra tools.
Once you can keep a simple trail alight consistently, then try more intricate patterns.
What can you burn on an incense trail?
Think in tiny quantities. Finely powdered aromatic woods, a dusting of dried herbs or flowers, and very small fragments of resin can all be explored, provided the underlying trail is capable of staying lit. Different materials behave very differently when heated, so test one addition at a time before building a complex blend.
For resin ideas, read The Best Natural Resins for Incense Making. If you would rather make self-burning incense in another form, see How to Make Incense Sticks at Home.
Incense trail troubleshooting
The trail keeps going out
Check for gaps, sections that are too thin, damp powder or a mixture that is not actually formulated to smoulder continuously. Over-compacting the trail can also reduce airflow.
The trail burns too quickly
Your line may be very thin or loose. Try a slightly broader, more consistent trail and press it gently so the ember advances rather than racing through fluffy powder.
It smells bitter or burnt
Reduce the amount of added resin or botanicals. A trail is a small heat source; piling aromatic material on top can change a subtle smoulder into an overloaded burn.
If harsh or scorched aromas are the main problem, see Why Does My Incense Smell Burnt? 7 Common Mistakes for a fuller heat-control troubleshooting guide.
Safety when burning an incense trail
Treat an incense trail like any other smouldering incense. Use a proper heatproof bowl on a stable surface, keep it away from curtains and dried arrangements, ventilate the room and never leave it unattended. The ash can hide heat, so allow the entire bowl to cool fully before stirring, cleaning or disposing of material.
FAQs What Is an Incense Trail
1. What is an incense trail?
An incense trail is a continuous line or pattern of combustible incense powder placed on fine ash and lit at one end so a small ember travels gradually through it.
2. What is makko powder?
Makko is a plant-based powder used in incense making as a combustible binder and base. Suitable makko can help a powdered incense trail maintain a steady ember.
3. Can I make an incense trail without a koh press?
Yes. A shallow S-shaped channel made by hand in fine incense ash is a good beginner method. A press or seal becomes useful when you want neat, repeatable patterns.
4. Can I use sand instead of incense ash?
Use fine purpose-made incense ash rather than ordinary sand. The ash supports the trail while allowing air to reach the smouldering powder; dense sand can restrict airflow and make a continuous trail unreliable or cause it to go out.
5. How long does an incense trail burn?
Burn time varies with the length and thickness of the trail, the powder mixture and how tightly it is packed. Start with a short trail so you can observe the full burn before trying larger patterns.


Comments